Building a custom remote-controlled Lego tank
Note - in this article I use the name “Lego” to describe any construction set of that type - including “bootleg” sets and my own 3D-printed parts.
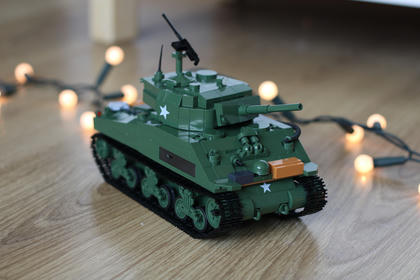
This idea has hit me when I was assembling a Sherman M4A3E2 tank kit from Cobi.
While it was fun while it lasted, as soon as the assembly is over there is not much you can do with the end result. I highly doubt that I myself will be playing with it - so unless some unsuspecting visitor will lay an eye on it such model will sit on a shelf and gather dust. Making the model animated makes it much more appealing, and I already spend quite some time driving it across the vast plaines of my living room.
The model comes equipped with a fully functioning set of tracks which simplified my work a lot (even though I’d like to try 3D-printing tracks for the later use)
3D-printing Lego blocks
As expected 3D printing compatible parts is a challenge because of the tight tolerance requirements. Too much slack will lead to loose parts that won’t attach to other blocks.
Tolerances also depend on a particular 3D printer and it’s calibration. If the nozzle is too close to the build surface first couple of layers may come out deformed - a well-known effect known as an “elephant’s foot”. Even if there are no visible artifacts the layer thickness may be affected, leading to a more tight or loose fit.
It took me quite some time to produce parts that fit well enough.
Battery
There are a variety of options when it comes to powering the model. At first I wanted to use a single 18650 battery because they are commonly available, relatively inexpensive and pack a good capacity for their size. Unfortunately fitting such battery is not possible without modifying the tank layout, and I did not have enough spare blocks to make that happen.
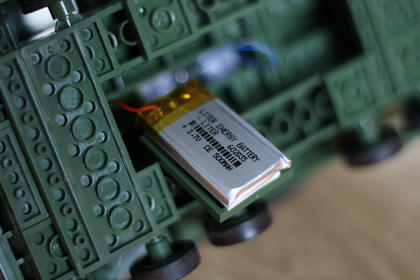
So instead I had to use a smaller 500 mAh 602035 battery. Even though it has at least 4 times less capacity than a regular 18650, such small battery is enough to power this model. My initial tests showed that even after driving on full throttle for a couple of minutes it does not lose much charge.
I glued it to a spare piece of Lego with a double sided adhesive and attached it to a cavity underneath the vehicle.
The engines
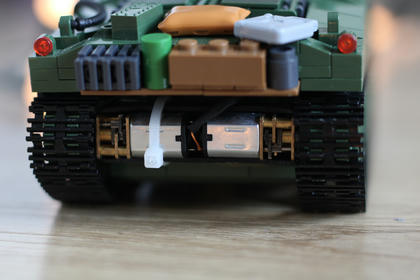
I used a pair of N20 mini motors from AliExpress to drive the tracks. Such motors are available in a wide variety of gear ratios and voltage ranges. Here are some examples of such motors suitable for this task:
| Voltage (V) | Speed (RPM) | Torque (Kg/cm) |
|---|---|---|
| 3 or 6 | 100 | ≥ 1.1 |
| 3 or 6 | 200 | ≥ 1.2 |
| 3 or 6 | 300 | ≥ 0.5 |
| 3 or 6 | 500 | ≥ 0.3 |
Since the entire model is powered from a single lithium cell it would’ve been the best to have a motor rated at 4 or 5 volts. Unfortunately, I did not find such option.
In my first experiment I used 6V, 500 RPM motors. I figured that having a slight voltage margin is good for the overall motor health. I’m not completely happy with the results though - the tank starts to move only at about 70% throttle, and it’s struggling to turn on anything other than a solid flat surface. I’ve ordered a couple of slower, but more powerful 3V, 200RPM motors. I’ll just limit the PWM duty cycle to not let them overheat or be damaged by a higher battery voltage.
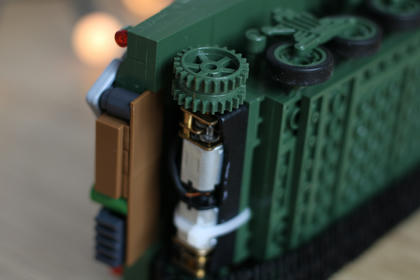
Both motors are mounted on a 3D-printed bracket with zip ties. The bracket has a set of mounting holes for each motor, but I had a hard time finding the right screws.
The hole in the pulley mostly matches the diameter of a motor shaft. I just used a piece of shrinking tube on top of that to make a proper connection.
Remote control
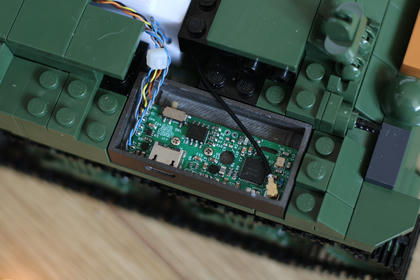
I used my own remote control board from my Syma S107g Bluetooth mod project.
The board is mounted in a 3D printed case that designed specifically to replace a couple of blocks from a side.
I had some Tamiya Mr.Color paint laying around but unfortunately neither “Khaki Green (54)” nor “Olive Drab (12)” matched the color of the kit. I had to paint this block with metallic “steel” paint. It still looks ok to me - but in a hindsight I could’ve located the remote control module somewhere else instead of ruining the entire side of the vehicle.
All the wires are soldered to the board directly. It should be possible to use 2.0 mm pin headers, but they are relatively rare and I don’t have them at the moment.
To be updated…
